
Blog
Eric here.
Installment two of turning a garage into a studio, entitled: "Why is is raining inside?" The garage is a cement block building built in the early 1970's by the man who owned the property previously. When we moved in, he put a rubber roof on the garage for us, but it wasn't really the right kind of rubber. He worked for a landfill company and it was a huge sheet of rubber that he had salvaged from the company which owned the landfill.
Also, we live at the bottom of a long, sloping hill that aims like an arrow directly at the garage, All the runoff from a ten-acre field drains right down onto the back right corner. Needless to say, we had water in the garage. After a while, we literally had piles of mud filling up inside at the one corner, which we could scoop up with a shovel.
So we had leaks in the roof and leaks in the foundation. I figured we'd tackle the foundation first because it wouldn't nearly cost as much as a 1,200 square foot roof.
The second rule we had for the garage was not to go into debt for the building, so we were going to have to do the hard work ourselves, dig out the trench, haul the stone. So one bright day in March 2013 we started digging out the back of the foundation. Over the next couple months, the boys and I dug a trench to expose the foundation.
It was 4 feet deep and 18 inches wide at the deep end and gradually sloped down to just six inches deep at the other.
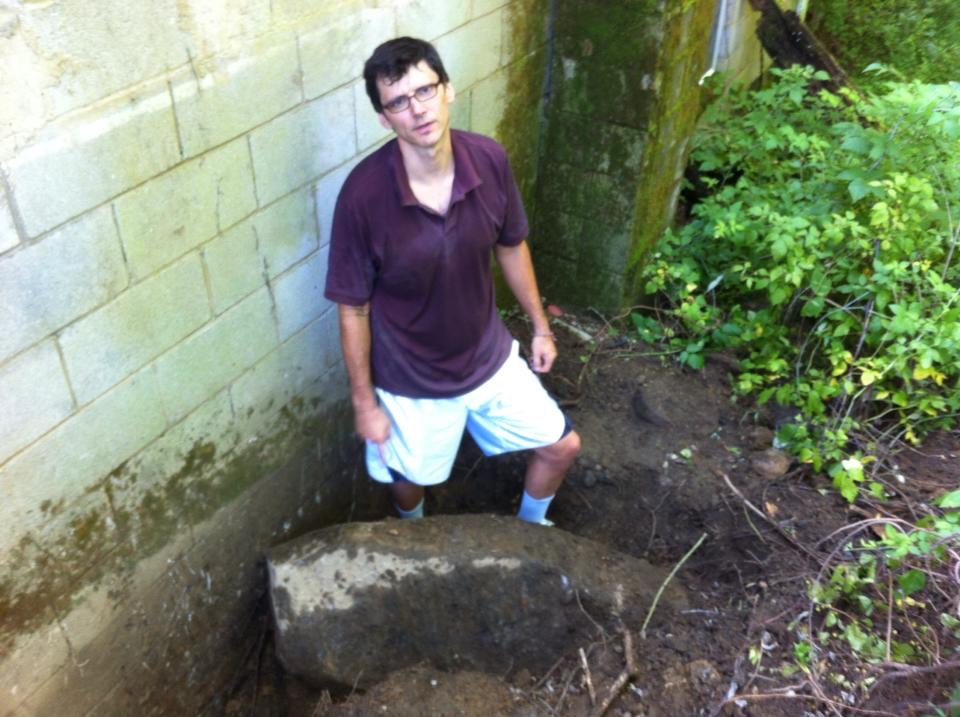
Sounds like it should be easy, but our property seems to be filled with what is known as glacial till and glacial erratics, rocks deposited by glaciers when they finally melted at the end of the last ice age. The small ones we could move, the three of us men, they weighed a couple hundred pounds.. But then there was "Peter". Peter was a big rock that was about an inch away from the wall. We dug under and around it, and tried moving it, first three of us, and then all five of us. Peter didn't even budge and that's when he got a name. So we had to eventually get a friend with a backhoe to come down and move it. While he was there he redirected the swale so that it went away from the building.
Since you only want to dig out a foundation one time, I wanted to give it every chance to work, right? After it was dug, we scraped the wall down with wire brushes and painted below ground level with DryLok. Then we used the rubber from the roof, which was all torn up anyway, draped it into the trench, put two lengths of perforated drainage hose in a silt sleeve in the bottom of the trench the whole way along the foundation and led it away into the yard.
At the cold end of fall, we had 5 ton of stone (don't say "tons" of stone to a stone supplier, they laugh at you) delivered to the top of the driveway. We bucketed all of it about 50 feet around to the back of the garage in about four hours. We also found out that 5 ton of stone looks like a lot, but it isn't. But at least we had the trench filled completely about halfway along the wall in back before winter came along.
Over the winter I decided to remove the chimney which was halfway along the wall because I didn't like how we had to divert the drain pipe around it. You can see it behind me in the picture, moss-covered. So first thing in the spring we took a sledge hammer to it. Then we rearranged the drain pipe so it went straight down the wall and not around it.
I didn't adhere the rubber to the foundation walls like you see in videos about foundation treatments. Those treatments are expensive and can only be done professionally. However, I did come up with the idea of using EPDM roof seaming rubber, which is essentially a large roll of rubber that has adhesive on both sides. We stuck it on the wall behind and pressed the rubber sheet onto it. Then we used a wider rubber flash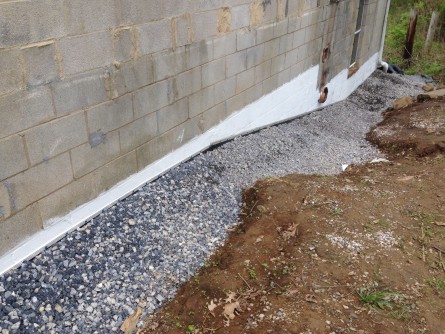 ing (only ahderes on the back) to go over the top of it. Right away we used a bunch of Tapcon screws to screw a roofing termination bars into the wall. Then we got 5 more ton of stone and finished filling in next to the foundation.
So essentially I guess we built a rubber roof below ground level to keep the water from coming in the foundation. It worked great, too, and looked good when it was done. No more mudslides in the interior and the inside dried out pretty quickly. Cost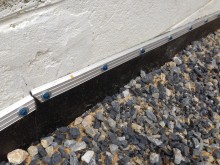 s: Stone, $240, Drylock, $120, EPDM stuff, $250, Tools/Supplies, $300 Total cost around $900 (rubber was free).
The only problem was even after all that work, when it rained, water came in the foundation again, only not as much. Also I noticed it came in the rear left corner, which I now knew from digging out in the back, wasn't even below ground
level! So disappointing!
But, wait, how could water be coming in the foundation which was above ground? Three words: Hollow block wall. Next
chapter I talk about the 2014 summer project, putting on the roof.
Later!